· 16 min read
How to Use Flight Computer E6B: Step-by-Step Guide
Learn how to use flight computer E6B for wind correction, time, speed, distance and fuel burn, with worked examples and practice for student pilots.
You've got a navigation log open, a wind forecast beside it, and an E6B in your hand. The numbers look familiar, but you're not sure which scale to move or whether the answer means minutes, miles, or knots.
Learning how to use a flight computer E6B gets easier when you stop treating it as a collection of tricks. Name what you need, set up the relationship, then check whether the answer makes sense for the airplane. Work slowly enough to explain each movement before you try to work quickly.
Table of Contents
- Know Which Side of the E6B Solves Your Problem
- How to Solve a Wind Correction Problem Step by Step
- How to Solve Time, Speed and Distance on the Calculator Side
- Fuel Burn and Unit Conversion Answers Worked Through
- Catching Errors and Choosing Test-Day Equipment
- Build a Daily E6B Practice Set
Know Which Side of the E6B Solves Your Problem
The E6B has two working faces. As AOPA's explanation of wind-triangle computers describes, the wind side solves the wind triangle, while the calculator side handles relationships such as speed, time, distance, and fuel consumption.
The wind triangle connects the aircraft's motion through the air, the wind's motion, and the resulting motion over the ground. Holding a heading doesn't guarantee that you'll follow the intended track. Wind can move you sideways and change how quickly you reach your destination.
A valid wind setup needs:
- Course: True course, or magnetic course converted using variation.
- True airspeed: The aircraft's speed through the surrounding air.
- Wind direction: The true direction the wind comes from.
- Wind velocity: The wind speed in units matching your airspeed.
The calculator side is a circular slide rule. It solves proportions without batteries or menus. For example, the AOPA explanation's 120-knot cruise for 1.5 hours gives approximately 180 nautical miles, before accounting for wind.
Which E6B side and scale solves each problem
| Problem | E6B side | Scale to use | Inputs needed |
|---|---|---|---|
| Wind correction and groundspeed | Wind side | Wind grid with sliding TAS scale | True course, TAS, wind direction, wind speed |
| Time, speed and distance | Calculator side | Speed, time and distance scales with 60-minute index | Any two of time, speed, distance |
| Fuel burn and endurance | Calculator side | Fuel flow scale against time | Fuel flow and time, or usable fuel |
| Unit conversion | Calculator side | Conversion scales for statute miles, nautical miles, and kilometres | Value and the units to convert |
| True airspeed from altitude and temperature | Calculator side | TAS window with pressure altitude and temperature | Pressure altitude, outside air temperature, calibrated airspeed |
Scale labels and window layouts differ between models. Keep your E6B's instructions nearby, especially for airspeed and altitude calculations.
Name the unknown and choose the side before touching the wheel. That small pause prevents a correctly performed calculation from answering the wrong question.
How to Solve a Wind Correction Problem Step by Step
Use this hypothetical practice problem: true course 090°, TAS 110 knots, wind from 240° at 25 knots. You want the heading that maintains the course and the resulting groundspeed.
The procedure below uses the common mechanical-E6B method: mark the wind above the centre grommet, place that mark on the TAS arc, and read groundspeed under the grommet. Don't combine it with a different plotting method.
Use this visual alongside the written setup.
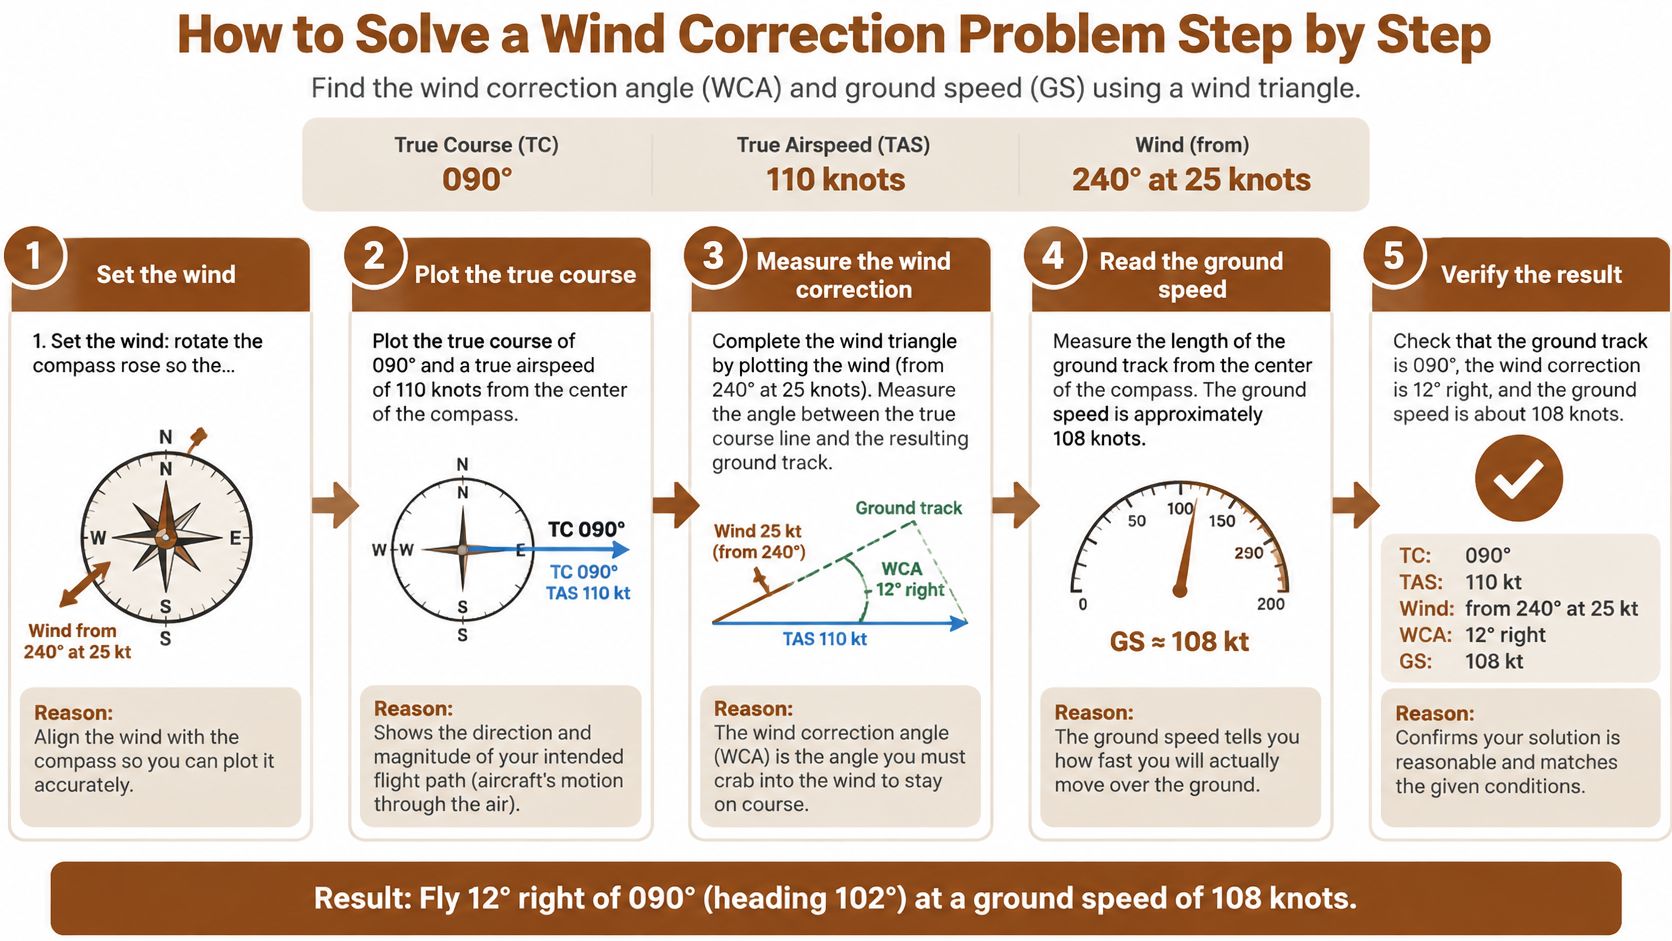
Plot the wind and course
Set the wind direction. Rotate the compass rose until 240° sits beneath the true index. Move the sliding grid until the centre grommet rests on a convenient reference arc. The direction is where the wind comes from, not where it travels.
Mark the wind velocity. Measure 25 knots upward from the grommet along the centre line and make a small pencil dot on the transparent rotating disc. Count the grid spacing carefully. A large or fuzzy mark makes the later reading less precise.
Set the course. Rotate the compass rose until 090° is beneath the true index. The pencil dot moves with the transparent disc; don't redraw it or try to hold it over its original grid position. Your course and wind must use the same true reference, so convert a magnetic course before this setup.
Set true airspeed. Slide the grid until the wind dot lies on the 110-knot TAS arc. Do not place the grommet over the airspeed value directly. In this plotting method, the dot belongs on TAS and the grommet provides groundspeed.
Read and verify the result
Read correction and groundspeed. The dot falls approximately 6° right of the centre line, giving a true heading near 096°. Read approximately 131 knots under the grommet. These are calculated practice answers, so a small mechanical-reading difference is expected.
Apply the reference correctly. Record the true heading, then apply magnetic variation and compass deviation as appropriate for the heading you'll fly. Don't put an unconverted true heading straight onto a magnetic navigation log.
For this scenario, the calculated wind components are approximately 22 knots of tailwind and 12 knots of crosswind from the right. A right correction and groundspeed greater than TAS fit those conditions. The groundspeed is slightly less than TAS plus the full tailwind component because some airspeed is used to counter the crosswind.
Wind check: Point the nose toward the side the crosswind comes from, then ask whether the groundspeed fits the wind's along-course component.
If the weather inputs themselves are unclear, review aviation weather theory before practising more wheel movements. A neat wind triangle can't rescue the wrong forecast or reference direction.
How to Solve Time, Speed and Distance on the Calculator Side
The calculator side keeps a constant ratio between aligned values. For navigation, the outer scale commonly represents distance or speed, while the inner scale represents time. Check your model's labels before starting.
Identify the rotating scales and rate index on your own computer as you look at this example.
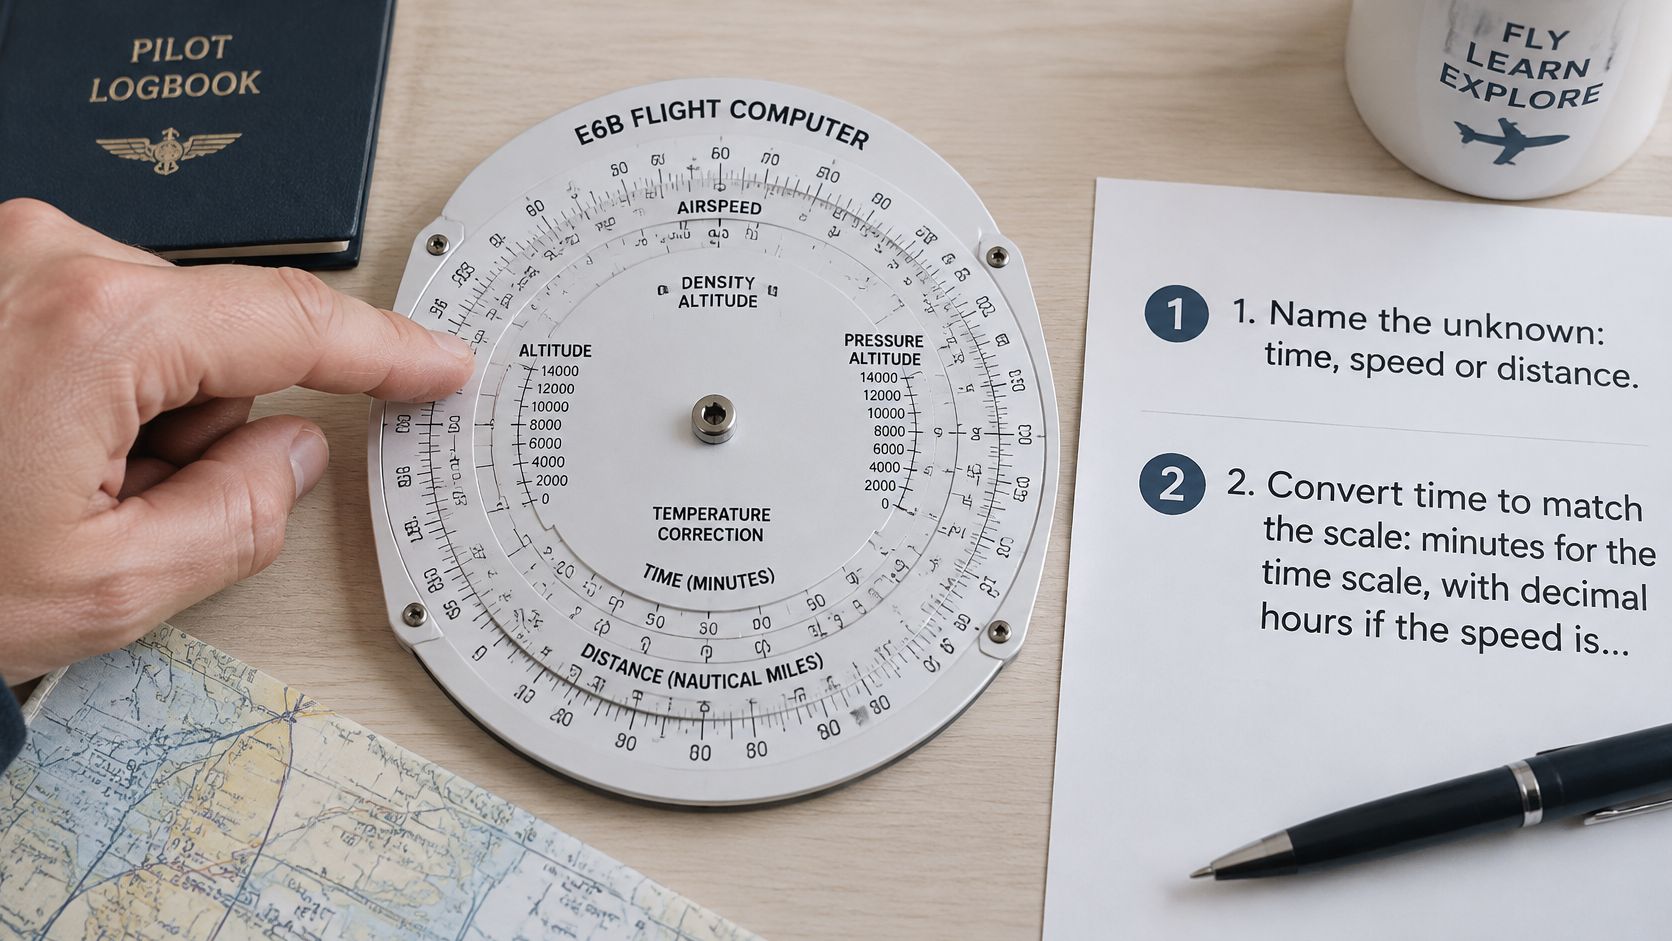
Set the relationship before reading
Name the unknown. Write “time,” “distance,” or “speed” beside the problem. Use groundspeed for progress over the ground, not TAS.
Choose a consistent time format. When using the minute scale, convert the entire duration to minutes. Decimal hours work in the equation, but a decimal-hour value isn't interchangeable with a minute-scale reading.
Set the rate. Align the known speed on the outer scale with the 60-minute index on the inner scale. You've established distance travelled per hour.
Read distance opposite time. Find the elapsed minutes on the inner scale and read the corresponding outer-scale distance.
Read time opposite distance. If distance is known instead, find it on the outer scale and read minutes beneath it.
Reverse the setup for speed. Align known distance with known elapsed minutes. Read the speed opposite the rate index.
Try these hypothetical examples with your wheel:
| Unknown | Practice setup | Calculated answer | Reasonableness check |
|---|---|---|---|
| Distance | 140 knots opposite the rate index; read opposite 45 minutes | 105 NM | Three-quarters of an hour gives three-quarters of the hourly distance |
| Time | 105 knots opposite the rate index; find 210 NM | 120 minutes, or 2 hours | The distance is twice the hourly speed |
| Speed | Align 105 NM with 45 minutes | 140 knots | Covering that distance in less than an hour requires a higher hourly rate |
For a hypothetical duration of 2 hours 15 minutes, use 135 minutes, not 2.15 hours. The decimal portion of an hour represents a fraction of an hour, not a number of minutes.
Watch the wheel movements, then repeat them with the video paused.
Use the TAS window separately
To find true airspeed, align pressure altitude with outside air temperature in the designated window. Then locate calibrated airspeed on the appropriate inner scale and read TAS opposite it on the outer scale, following your model's instructions.
Use calibrated airspeed rather than substituting indicated airspeed without considering the aircraft's correction. In lower-density air, TAS should exceed calibrated airspeed.
On models with a density-altitude window, the altitude-and-temperature alignment also supports that reading. Warmer-than-standard conditions should produce density altitude above pressure altitude. Use the aircraft's performance charts to interpret the result.
Fuel Burn and Unit Conversion Answers Worked Through
Treat these as hypothetical training problems, not aircraft-specific planning figures. The table shows calculated results rounded to the nearest tenth of an hour or whole gallon where appropriate. Keep unrounded intermediate values when completing an actual fuel calculation.
Worked fuel and conversion answers
| Problem | Given | Setup | Answer |
|---|---|---|---|
| Fuel used | 8 gal per hour for 2.5 hours | Fuel flow times time | 20 gal |
| Endurance | 20 usable gal at 8 gal per hour | Fuel divided by fuel flow | 2.5 hours |
| Fuel to fly a leg | 180 NM at 120 kt, 9 gal per hour | 1.5 hours times 9 gal per hour | 14 gal, rounded from 13.5 |
| Fuel for a short leg | 45 minutes at 12 gal per hour | 0.75 hour times 12 gal per hour | 9 gal |
| Statute to nautical | 50 statute miles | Conversion scale, statute to nautical | About 43.4 NM |
| Time from distance | 180 NM at 120 kt groundspeed | Distance divided by speed | 1.5 hours |
Understand the fuel relationships
Fuel used equals fuel flow multiplied by time. On the circular slide rule, set hourly fuel flow against the rate index. Find elapsed minutes on the time scale, then read gallons opposite that value.
For the fuel-used row, the answer should exceed the hourly burn because the flight lasts longer than an hour. For the short-leg row, it should be less than the hourly burn because the duration is shorter.
Endurance equals usable fuel divided by fuel flow. With the rate set, locate usable gallons on the outer scale and read the corresponding time. Increasing fuel flow while holding usable fuel constant must reduce endurance.
Leg fuel depends on leg time. First calculate time using distance and groundspeed, then apply fuel flow. The table's rounded leg-fuel answer is suitable for understanding the arithmetic, but rounding isn't a substitute for a complete fuel plan.
Calculated endurance isn't permission to remain airborne until the tanks are empty. Account separately for taxi, climb, reserves, and the conditions affecting the flight.
Keep conversion direction visible
For statute-to-nautical conversion, locate the labelled conversion marks. On a common layout, align the known distance with the statute marker and read the corresponding value at the nautical marker; follow your model's printed arrangement.
A nautical mile is longer than a statute mile, so the same distance requires fewer nautical miles. That's why the table's nautical figure is smaller, not because the nautical unit is shorter.
Fuel planning also affects loading. Use the appropriate fuel quantity and aircraft-specific weight information when completing weight and balance in aviation.
For independent practice, try this hypothetical problem: 75 NM at 150 knots groundspeed, burning 11 gallons per hour. Find the leg time and fuel required, then explain whether each result fits a flight lasting less than an hour. Leave reserve planning separate from the arithmetic.
Catching Errors and Choosing Test-Day Equipment
A mechanical E6B answer can look neat and still be wrong. Start by checking the setup, especially whether the scales line up with the values and units you intended. The StudentPilot's flight-computer resource also emphasizes checking whether an answer makes sense before you use it.
Use this routine before accepting a result:
- Identify the unknown. Say what the answer represents, such as time, distance, or groundspeed.
- Confirm units. Label each input before aligning scales or entering numbers.
- Estimate mentally. Decide whether the answer should be larger or smaller, longer or shorter.
- Perform the operation. Keep your finger or pencil beside the scale you're reading.
- Compare the result. If it conflicts with your estimate, find the cause before copying it into the navigation log.
Diagnose the kind of mistake
Check three layers: the physical setup, the mathematical relationship, and the aviation meaning. Each points to a different possible error.
| Error source | What to inspect |
|---|---|
| Scale misalignment | Are the intended marks directly opposite each other? |
| Reciprocal wind direction | Did you enter where the wind comes from, rather than where it goes? |
| Unit mismatch | Are time formats and distance units consistent? |
| Wrong airspeed | Does this operation call for indicated, calibrated, or true airspeed? |
For a decimal-error check, 120 knots for 90 minutes should produce 180 NM. A result of 18 NM is an order-of-magnitude error, not a plausible alternative. Check how you interpreted the time, read the scale, and placed the decimal before repeating the calculation.
Repeating the same setup can reproduce the same mistake. Instead, put the device aside and explain the relationship in words. If the explanation does not support the result, revisit the setup and units.
Use this checklist while rehearsing.
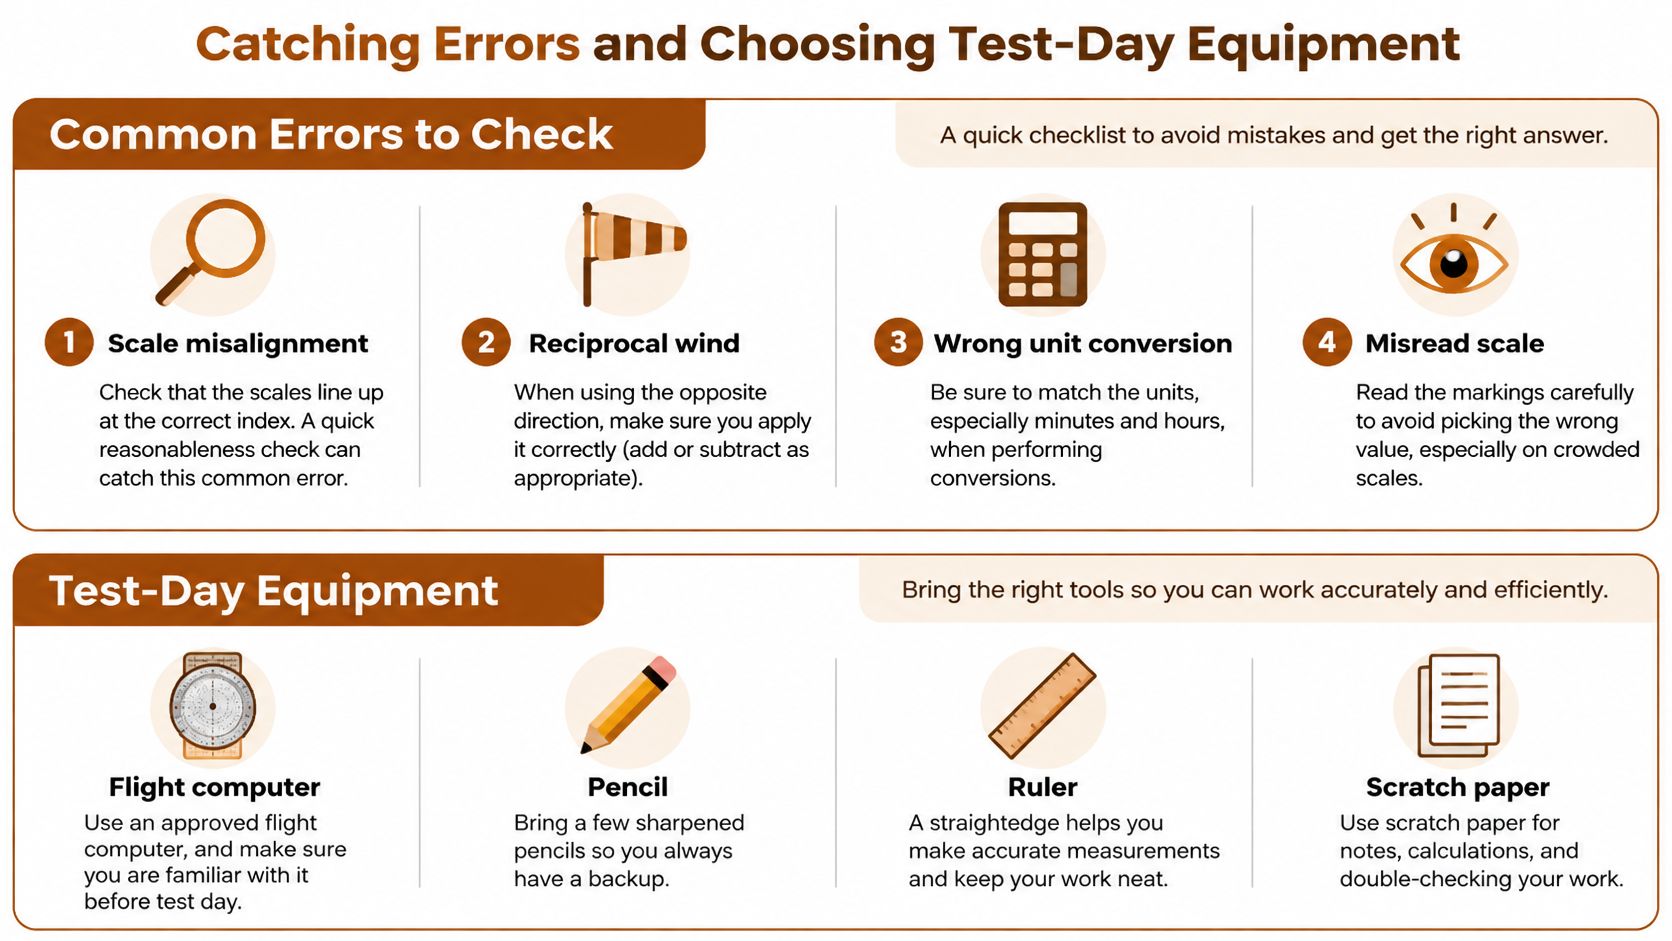
Choose equipment you can actually use at the test
Knowledge-test calculator rules are set by the testing system and may depend on the equipment you plan to use. Before test day, confirm what is permitted with your testing center and check the current PSI instructions. Do not assume that an online E6B, a phone app, or a particular calculator will be allowed.
A device you know from practice may not be an option in the testing room. Rehearse with the equipment you expect to use, and check any applicable instructions about its functions and memory.
Compare the options by how you work:
- Built-in calculator: You do not need to bring a separate calculator, but you must understand its fields, units, and output labels.
- Mechanical wheel: Its scales make relationships visible, but accurate answers depend on alignment and reading the right scale.
- Standalone electronic E6B: It offers dedicated aviation functions, but you still need to understand its prompts and confirm it is permitted.
Electronic doesn't automatically mean correct. A precise-looking display can still reflect the wrong input, reference direction, or unit. Faster entry helps only when you understand what you are entering.
The device can change. Distance still equals groundspeed multiplied by time, and fuel still depends on duration and consumption rate.
Practice a problem you have not memorized on the wheel, then solve it on the electronic option you expect to use. Compare the answers with your estimate and explain why they are reasonable. The display and controls may differ; the aviation math does not.
If you are testing under a different aviation authority, check that authority's equipment rules. Shared calculations do not mean shared examination policies.
Build a Daily E6B Practice Set
Give yourself a short daily practice session rather than an occasional marathon. As a suggested training routine, reserve 20 minutes for two wind problems, two time-speed-distance problems, and one fuel problem. These are practice targets, not an official proficiency standard.
Choose problems that connect to a plausible navigation log. Change the course or wind direction between wind exercises, and alternate between finding time, distance, and speed. Write each answer with units and a sentence explaining why it makes sense.
Track the reason for each miss
Use a simple error log:
- Unit: You mixed minutes and hours, or statute and nautical miles.
- Alignment: You set the correct values against the wrong marks.
- Direction: You reversed the wind or applied correction the wrong way.
- Interpretation: You calculated correctly but labelled or used the answer incorrectly.
Repeat your weakest category for a suggested week, while keeping other skills in the daily set. Don't erase the original mistake before recording its cause. The useful record is why you missed it, not just how many answers were right.
Decide when to broaden your preparation
As a personal practice benchmark, aim to solve all five problems correctly in under 10 minutes, including their checks. If you can do that consistently, broaden your PPL written-test preparation. If you can't, spend another practice week on the weakest category rather than rushing.
That benchmark measures this narrow skill, not readiness for the entire knowledge test. You still need weather, regulations, airspace, aircraft performance, and the other subjects relevant to your rating.
Bring your completed set and error log to your next flight lesson. Ask your instructor to watch a wind setup and check how you transfer its answers to a real flight plan. Bite-sized sessions fit between lessons, but connecting the calculation to an actual flight is what makes the skill useful.
Our study coverage includes navigation, weather theory, performance charts, and weight and balance, so you can connect E6B calculations with the decisions behind FAA knowledge-test questions. Visit flyCowboys to build those topics into your written-exam study routine while continuing practical work with your flight instructor.