· 18 min read
Best Pilot Bag: How to Choose for Weight, Fit and Travel
Compare the best pilot bag types by weight, cockpit fit and airline limits, then test-pack your kit to choose the right bag for your flying.

Traditional flight bags can weigh far more than pilots expect. The bag's loaded weight matters more than its pocket count: a heavy shell, rigid hardware, and duplicate paper add weight without necessarily making the kit easier to use.
Choose the lightest bag that carries your actual gear, stays clear of cockpit controls, and meets the airline limits on your route. Judge it packed, measured, and ready to lift, not by its empty size on a shelf.
Table of Contents
- Best Pilot Bags at a Glance
- Why Weight Matters More Than Pockets
- Cockpit Fit and Restraint Checks
- Organization That Speeds Up Your Preflight
- Durability and Build Quality
- Airline Rules for Commuting Pilots
- How to Test-Pack Before You Buy
- Choose the Bag for Each Flying Role
Best Pilot Bags at a Glance
Use the ranges below as a first filter, not a promise that a bag will fit every cockpit or airline rule. Actual size depends on the loaded shape, and a soft bag can bulge beyond its listed dimensions.
| Bag type | Best for | Typical packed size | Typical weight | Airline fit |
|---|---|---|---|---|
| Compact pilot bag | Local training and short cockpit transfers | About 10 x 10 x 8 in | About 2 to 4 lb empty | Often suited to personal-item use, but check the route's limits |
| Soft under-seat flight bag | Local flying with tablet and headset | About 16 x 12 x 8 in | About 2 to 5 lb empty | May fit under a seat when lightly packed; confirm the carrier's personal-item rules |
| Large flight bag | Multi-day trips with heavy kit | About 21 x 11 x 11 in | About 4 to 8 lb empty | Can exceed the 25 cm depth in the IATA reference; check the carrier |
| Hard-shell roller | Airport-heavy commuting | About 22 x 14 x 9 in, including wheels and handle | About 5 to 9 lb empty | Wheels and handles count toward the carrier's size limit |
| Traditional paper-heavy bag | Legacy use with binders and manuals | About 18 x 14 x 10 in when packed | 30 to 40 lb typical, with a 37.5 lb median | Loaded weight can exceed a carrier's limit; check the route |
How to Read This Table
Packed dimensions include handles, wheels, straps, and full side pockets. The ranges are typical, so confirm the manufacturer's dimensions and measure the bag in the shape you expect to carry. A headset case or water bottle can push a soft bag beyond its listed size.
Compare empty weight with the weight of your normal load: headset, tablet and case, charger, batteries, documents, and water. Loaded weight is the useful comparison when choosing what to carry.
Airline fit depends on the route, cabin, and aircraft. A bag accepted as a cockpit bag on one flight may not qualify as a personal item on a regional jet.
Three Roles That Drive the Choice
For local training flights, a compact soft bag keeps the load suited to short transfers between the car and cockpit. For cross-country trips, look for room to protect a tablet and headset while keeping charts or a kneeboard accessible. For airline commuting, check the bag against the actual route's size rules. Extra capacity is of little use if the bag has to be gate-checked.
Choose for the longest trip you make regularly and the tightest cockpit you use. If one bag cannot handle both, carry a separate bag for occasional extra gear rather than hauling unused capacity every flight.
A large bag can serve an exceptional trip, but it adds bulk to every ordinary one. Match the bag to your usual kit and use a second soft bag or checked item for occasional extra gear when your operation allows it.
Why Weight Matters More Than Pockets
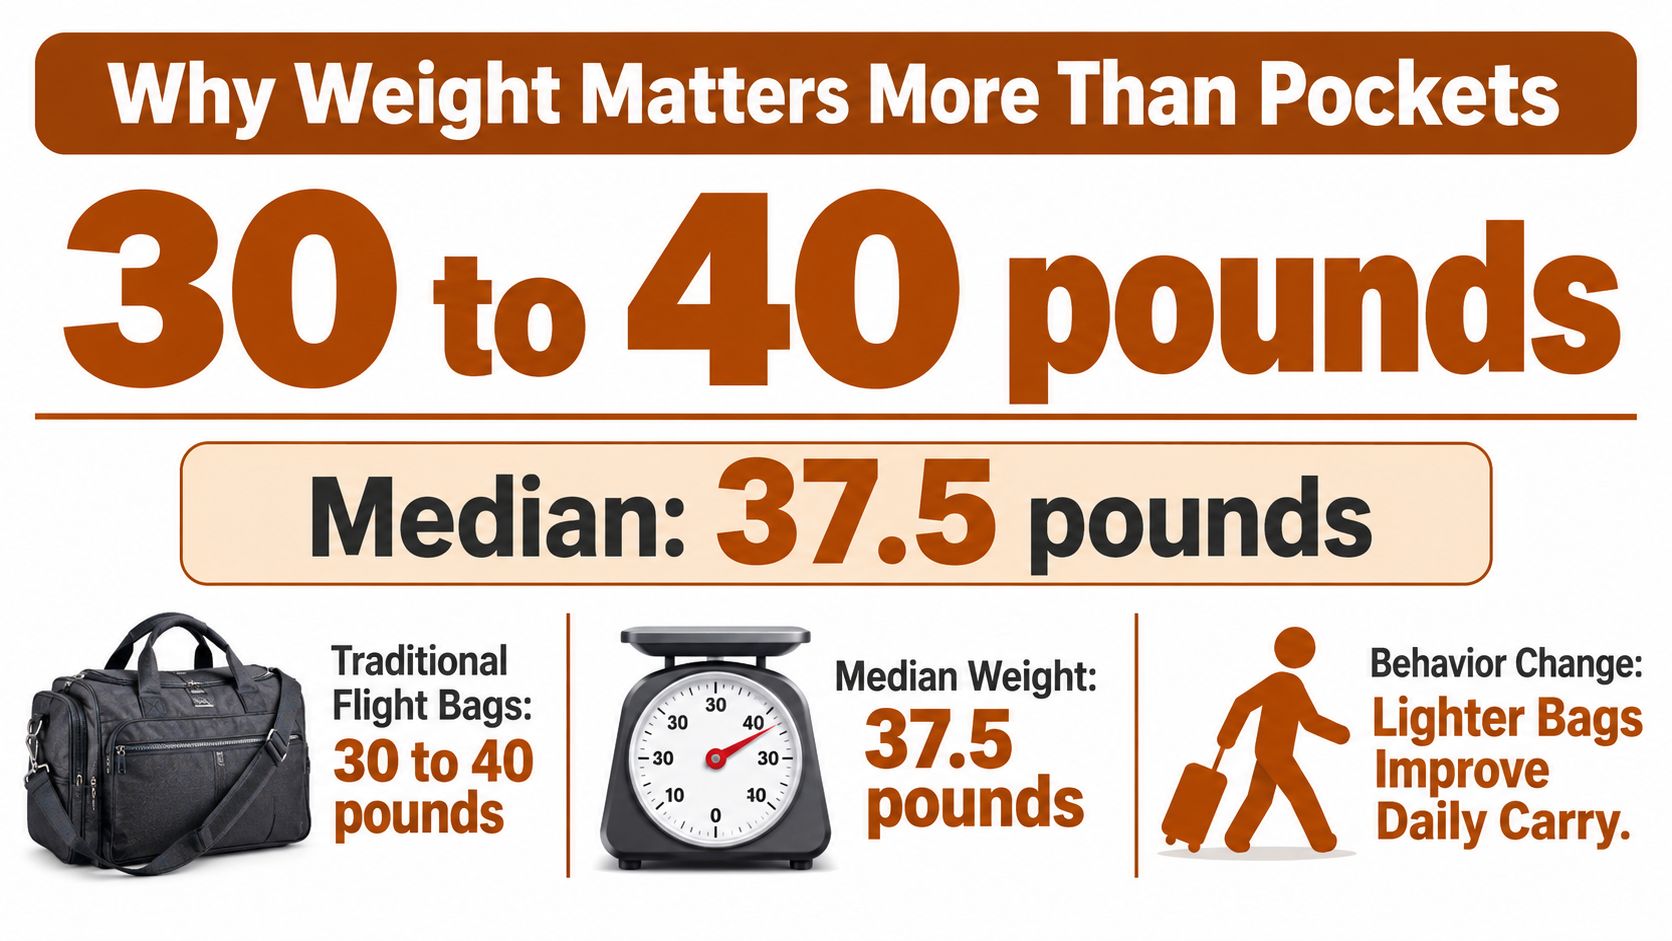
A published occupational-health review reported that commercial pilots' traditional flight bags commonly weighed 30 to 40 pounds, with a median of 37.5 pounds, or approximately 17.0 kilograms, according to the occupational-health review of commercial pilots' flight bags. The same review stated that most occupational low-back injuries seen in an airport-based clinic were attributable to use of flight bags. That's not an argument for a better shoulder pad. It's an argument for carrying less mass.
The Body Load Comes First
You don't carry a flight bag once. You lift it into a car, walk it from parking, climb stairs, hoist it into an overhead bin, drag it across a ramp, and lift it again into the cockpit. A bag that's merely awkward in a shop becomes a repeated twisting lift in real operations.
Shoulder straps spread load badly when the bag hangs away from your body. Wheels help on smooth terminal floors, then punish you on stairs, curbs, aircraft steps, and rough ramps. Padding doesn't fix excess weight. It only disguises it for the first few minutes.
The Aircraft Load Counts Too
Every pound you bring aboard is a pound the airplane carries. In a light aircraft, small differences matter because payload, fuel flexibility, and performance margin trade against each other. If you're tightening your loading discipline, work through weight and balance in aviation and then treat your bag as cargo with a measured weight, not as an afterthought.
Weigh the fully loaded bag, including water and spare batteries, write the figure down, and use that measured value when your operator or aircraft procedures require it. Don't estimate from an empty product listing.
Digital Kit Cuts Paper, Not Discipline
Electronic flight bags reduce carried manuals, binders, and duplicated reference material. Paper backups may still be required because acceptance varies among states and operators, so plan for the backup your operation requires, not for every document you might enjoy having.
Set a personal ceiling before you shop. It's the heaviest loaded bag you can carry comfortably over your longest routine walk, lift to overhead height without help, and move into the cockpit without twisting awkwardly. A listed compact bag at 1.95 lb empty gives you far more headroom under that ceiling than a legacy setup heading toward the old median. If a candidate bag eats most of your ceiling while empty, walk away, however handsome its pocket layout looks.
Cockpit Fit and Restraint Checks
A bag that fits under the seat can still interfere with pedals, controls, or a quick exit. Check where it will sit in the cockpit and how it behaves when loaded. Keep it secured, with nothing loose that could shift into the controls.
Five Checks to Run in the Aircraft
- Measure under-seat clearance first. Put the fully loaded bag in its planned stowage place. Confirm it fits securely under the seat or in an approved cockpit stowage location, with enough room to remove it without forcing it past structure or controls.
- Fit the sleeve to your primary tablet. Confirm the sleeve fits your tablet plus its protective case, with the closure secured. Don't buy a sleeve around a smaller spare device you won't use as your primary.
- Check for rigid protrusions. Run your hand over corners, buckles, wheel housings, and external hardware. Stiff or hooked parts can catch on rudder pedals or seat rails as you move the bag in a tight cockpit.
- Contain loose items. Put headset leads, charging cables, kneeboard straps, pens, and battery packs in closed compartments. A cable across the floor can snag a pedal.
- Sit in your normal position. Check that the stowed bag leaves room for your feet and full pedal travel, does not press against your leg, and does not force you to twist to reach the checklist. Keep your usual posture and harness position.
Smaller Often Wins in the Cockpit
A moderately sized bag with a dedicated, padded tablet compartment and quick-access chart storage is usually easier to stow than a large gear bag. A larger bag may hold more on the ground but sit awkwardly, obstruct an exit, or spill contents when opened at an angle.
Restraint rule: If turbulence can shift the bag or spill its contents into the controls, it is not properly stowed.
Test the bag in its heaviest normal configuration. Loaded, it shows its actual footprint and whether the contents stay contained.
Organization That Speeds Up Your Preflight
Organize by reach order, not by category labels printed by a manufacturer. Start with what you touch during start, taxi, departure, approach, and shutdown. Put those items where your hand can find them without looking down for long or emptying the main compartment.
Build Four Zones
- Immediate zone: Checklist, current charts or kneeboard, pen, and small flashlight in a front or top-accessible pocket. These items earn the fastest access because you use them when workload is already rising.
- Protected zone: Tablet in a fixed, padded sleeve that doesn't migrate inside the bag. Keep the screen away from charger bricks, headset hardware, and metal flight computers.
- Fragile zone: Headset in its own compartment or case, protected from being crushed by books or a water bottle. Don't let the headband become structural packing material.
- Support zone: Spare batteries, charger, cables, logbook, manuals, and personal items in a zippered main compartment. Keep your documents together so your flight log book routine doesn't turn into a post-flight excavation.
Write down the five things you reach for most during a flight. Assign each one to a zone before you compare a single product photo. If a bag gives your most-used item a buried home, its other pockets don't rescue it.
Open Top Versus Zippered
An open-top design gives fast access during preflight and makes it easy to drop items back in. The trade-off is security. Contents can shift, fall out in turbulence, or scatter during a rushed exit or when the bag tips on a ramp.
A zippered design protects contents and keeps cables contained, but it slows access and tempts you to leave it half open, which gives you the worst of both designs. I would choose zippered containment for anything carried in the cockpit, then insist on one external pocket I can open and close with one hand for the checklist.
Extra pockets aren't free. Each divider, zipper, padded wall, and organizer panel adds weight and bulk. A pocket only helps when it has one clear job, holds its item securely, and lets you confirm at a glance that the item is present. A bag with fewer, assigned spaces beats a bag with a maze you'll search under pressure.
Durability and Build Quality
A pilot bag lives on ramp grit, terminal floors, stair edges, wet steps, and cockpit floors. It gets lifted by one handle while loaded, dragged over thresholds, and shoved into tight stowage. Durability matters, but every reinforced panel, frame, wheel, and metal fitting adds weight you must count in the loaded figure.
Five Build Checks Before You Pay
- Inspect handle and strap anchors. Pull firmly on handles, shoulder-strap attachments, and grab points. Stitching should be dense, even, and reinforced where webbing meets the bag body, because these anchors take the shock of a loaded lift.
- Work every zipper under load. Pack the bag full, then open and close the main zipper along its full length. Teeth should stay aligned, pulls shouldn't twist in your fingers, and corners shouldn't need two hands and a knee.
- Check the base. Look for reinforcement against abrasion and confirm the bottom sits flat when set down. A bag that tips on a smooth floor will tip faster on a ramp and dump pressure onto a tablet or headset.
- Stress rolling hardware. On a roller, examine wheel mounts, axles, telescoping handle joints, and frame corners. Pull the loaded bag over a curb or threshold and listen for flex, grinding, or a handle that twists under load.
- Test the tablet compartment. Padding should protect against bumps without creating stiff external hardware. Close it with the device in its case, lift the bag by its main handle, and confirm the tablet doesn't slide or press against a hard divider.
Surfaces you can wipe clean are worth real money in daily use. Ramp dust, coffee, rain, and deicing residue don't care about premium looks. A durable build is only useful if the finished, loaded bag still passes your personal weight ceiling. Run the durability check and the weight check on the same bag, in the same loaded configuration, or you're approving two different products.
Airline Rules for Commuting Pilots
A cockpit bag that fits beside a training aircraft seat may still be too deep, rigid, or heavy for an airline commute. Judge it against the limits on the routes you fly, not a general carry-on benchmark.
| Rule source | Size limit | Weight limit | Key condition |
|---|---|---|---|
| IATA general reference | Varies by airline | Varies by airline | Allowances vary by airline, cabin class, and aircraft type |
| Delta carry-on | 22 x 14 x 9 in | Check the carrier limit for your fare and route before travel | Must fit in the cabin |
The IATA passenger baggage rules guidance explains that carry-on allowances vary by airline, cabin class, and aircraft type. Use the carrier's rules for your fare and route to confirm the actual size and weight limits. A general reference is a screening tool, not approval to board with a particular bag.
Measure the Bag Airlines Actually See
Measure the packed bag with handles, wheels, external straps, and filled pockets included. Record its empty weight and realistic loaded weight with the items you plan to carry. Then compare the packed dimensions and weight with each airline's published limits for your route.
Check before buying. A bag that fits on one route may not fit the limits for another fare or aircraft. For a commute, also check that you can lift the loaded bag into the overhead bin without help. Airline rules and physical handling both matter.
The Contrarian Problem With Aviation Organization
A bag with more aviation-specific storage can be a worse commuting choice. A rigid headset compartment, framed document section, full external pockets, or wheels can add bulk and weight. The main body may look compliant while the packed bag exceeds the limit or refuses to compress under a seat.
The most organized bag in the crew room is a poor travel bag if it does not fit the airline's requirements.
For commuting, a simpler soft bag and a small pouch for cockpit essentials may be the better trade-off. Organization helps only if the loaded bag still fits your routes.
Keep a route matrix with each airline, fare, aircraft type, published size and weight limits, and whether your loaded bag meets them. Buy only after the bag passes those checks without leaving out items you normally carry.
How to Test-Pack Before You Buy
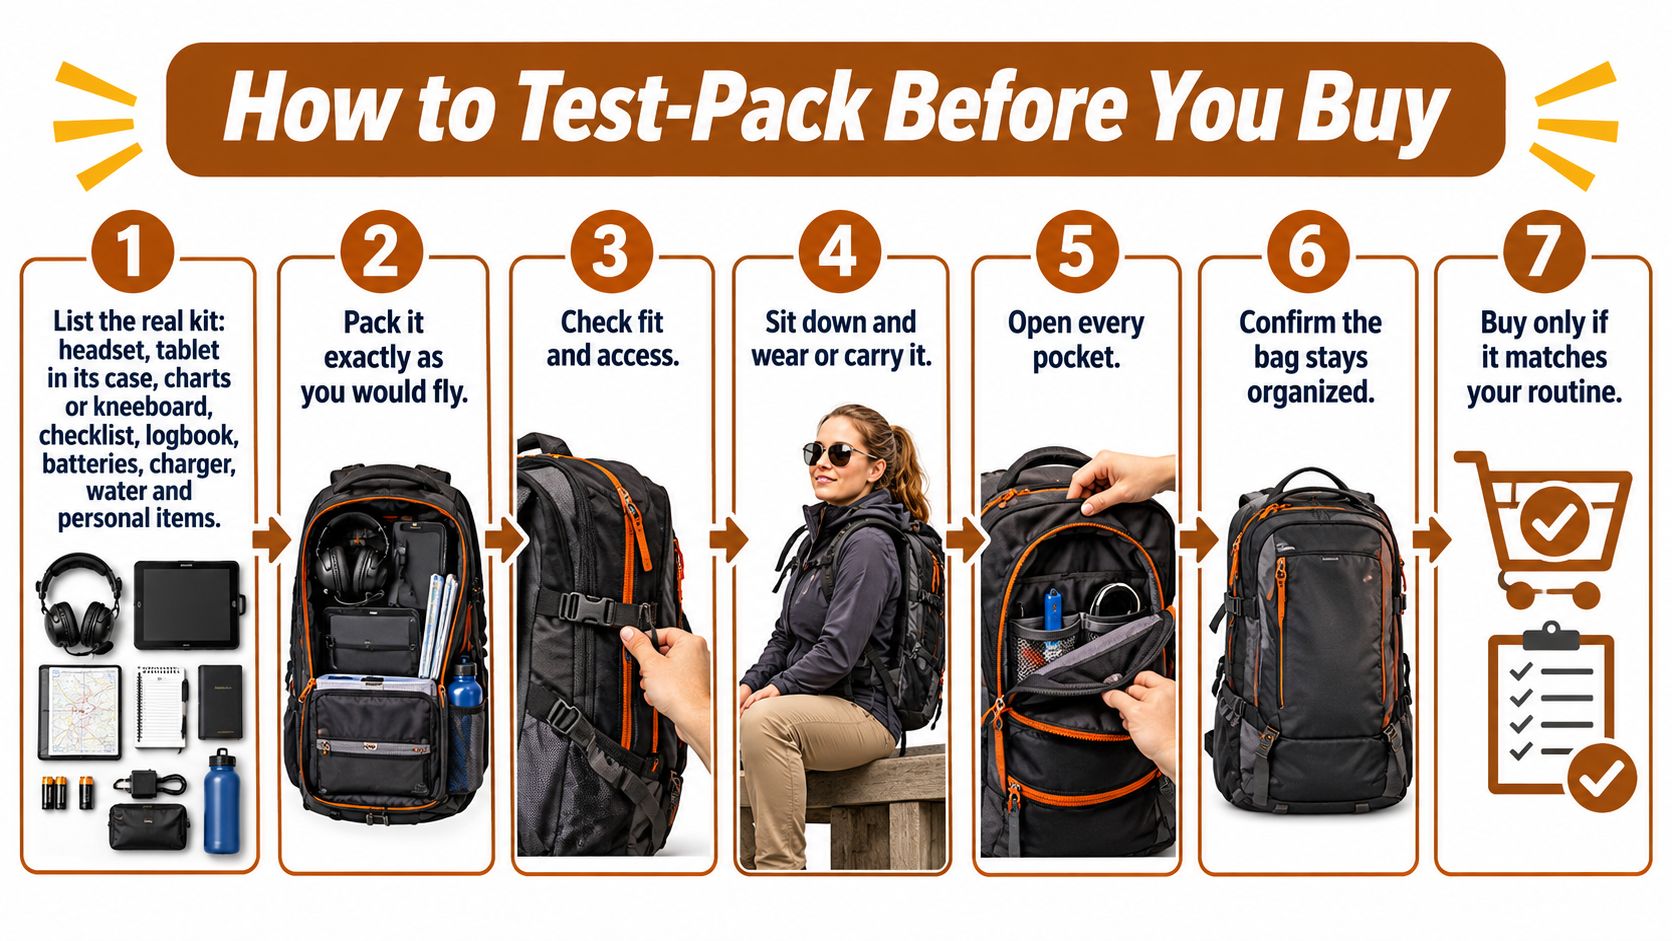
Don't judge an empty display model. Run a measured load-out test with the kit you'll carry on a normal flying day, then repeat the lift and walk portions for your longest airport routine. The goal is simple. Find the lightest bag that safely carries your actual setup without becoming uncomfortable or fragile.
The Seven-Step Load-Out Test
- List the kit. Write down your headset, tablet in its case, charts or kneeboard, checklist, logbook, batteries, charger, cables, water, and personal items. The common slip is listing the glamorous items and forgetting cables, adapters, and the water you'll definitely carry.
- Pack exactly as you'd fly. Put every listed item in its planned zone and close every zipper. If you have to sit on the bag, leave the charger out, or carry the headset separately, the bag has failed at step two.
- Weigh the loaded bag. Record pounds and kilograms with water and spare batteries included. Weighing an empty bag hides the burden and makes heavy internal structure look harmless.
- Measure the packed size. Measure length, width, and depth with handles, wheels, straps, and bulging pockets in their travel positions. The common slip is measuring the flat manufacturer shell while your side pocket carries a charger brick.
- Lift without help. Lift from the floor to shoulder height, then to overhead-bin height, using the handle you'd use in an aisle. If you need a swing, a knee boost, or a second hand on the base, note it as a commuting risk.
- Walk your route. Carry or roll it from parking to the aircraft, including stairs, curbs, ramps, and rough surfaces. Note where it pulls your shoulder, bangs your leg, twists in your hand, or refuses to track over thresholds.
- Sit with it stowed. Place the loaded bag in the aircraft or a close mock-up, sit normally, and confirm it fits under the seat or in approved stowage without touching controls or blocking your feet. Then retrieve your checklist and tablet without unpacking the contents onto your lap.
Two Tests, Not One
A short cockpit transfer rewards compact size, soft sides, and fast access. Day-long airport travel rewards comfortable carry, clean airline compliance, and hardware that survives stairs and bins. Run steps 5 and 6 for both routines, because a bag can pass a two-minute walk to a trainer and fail a long terminal commute.
Score each candidate on paper. Give it a pass or fail for loaded weight, packed size, unaided lift, walk comfort, cockpit fit, and one-hand access to your top item. Don't average away a failure. A bag that fails restraint in the cockpit or size at the gate isn't a compromise. It's a rejected candidate with good marketing.
If a shop won't let you load the bag, buy from somewhere with a return window and run the test at home before removing every tag. Keep the measured figures for your top two candidates. Those numbers will tell you more than another afternoon reading pocket counts.
Choose the Bag for Each Flying Role
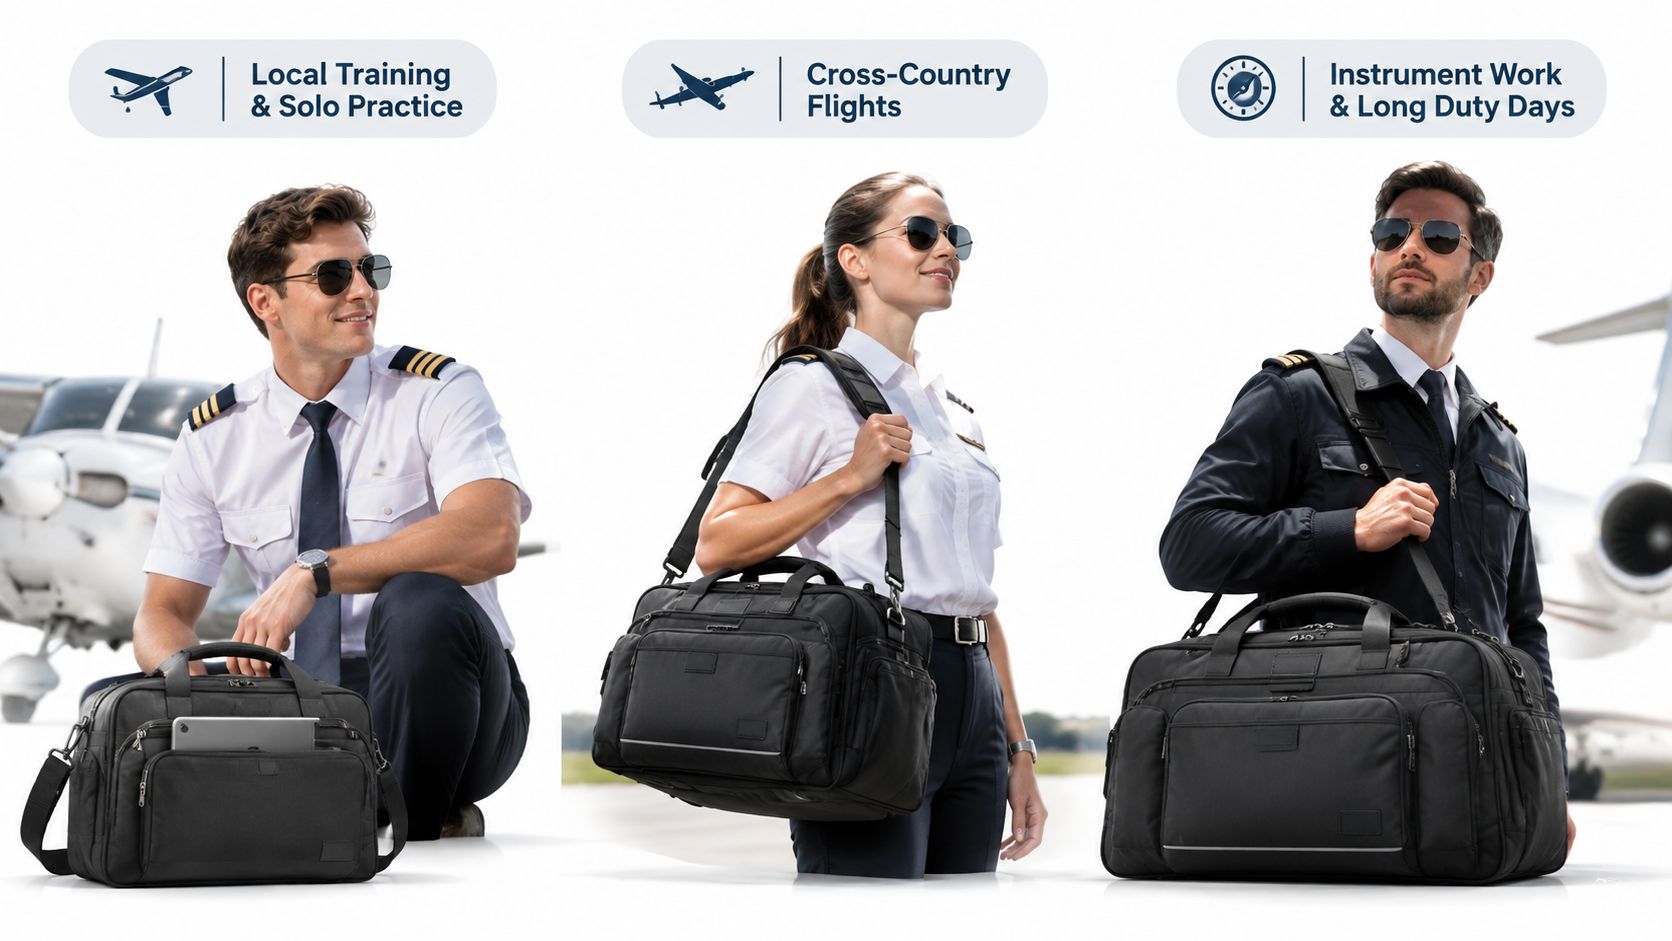
For local training and solo practice, choose a compact soft bag that fits under the seat, protects a tablet, and carries only the kit for that lesson. For cross-country flying, choose a mid-size bag whose loaded weight stays under your personal ceiling while giving charts, headset, charger, and documents assigned homes.
The three pilots below carry the same broad idea in different routines. Their bags still have to pass different aircraft, walks, and travel rules.
For airline commuting, choose the bag that meets size and weight limits on every regular route and that you can lift unaided, even if its internal organization is simpler. For long multi-day travel, choose a rolling bag only if its loaded weight, wheels, and handle pass your longest walk and stair test.
Pair the hardware decision with the digital kit you'll run. Comparing the best aviation apps helps you decide what belongs on the tablet before you buy storage for paper and accessories you may not need.
Watch a practical load-out being talked through, then compare it against your own seven-step scores rather than copying someone else's contents list.
Do one thing this week. Weigh your current kit, run the test on your top two candidates, and buy the one that passes both the cockpit and the airport. That's a decision you can defend every time you lift it.
When you're not wrestling a bag across the ramp, use the same measured approach for your FAA written prep with adaptive practice, plain-English explanations, radio drills, and logbook tracking in one place. Visit flyCowboys to build a study plan around your weak areas and keep your training progress as organized as the kit you carry.